
Build Strength at Home: A Practical Six-Step Plan
You can build serious strength at home without wasting time. This six-step guide shows prioritized gear, smart layout, simple programming, and safe progression so you get stronger steadily. Follow practical steps you can apply in any space and routine today.
Requirements

Step 1: Set Your Strength Priorities
Which lifts deserve your attention — and why they matter more than fancy machines.Decide which strength goals matter most before buying anything. Are you training for general functional strength, heavier barbell lifts, athletic power, or simply to move better every day?
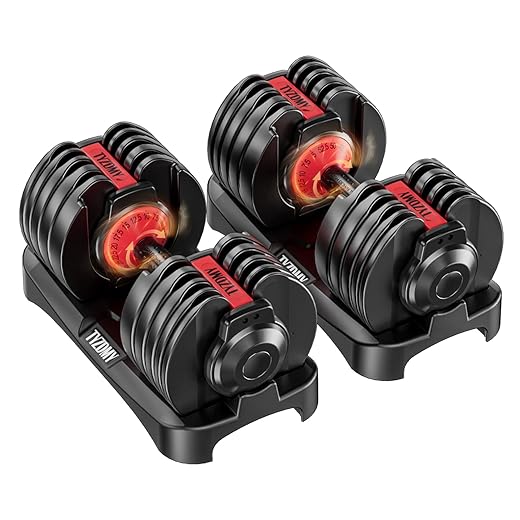
Prioritize compound lifts — squats, deadlifts, presses, and rows — because they give the biggest strength gains per minute. If your goal is heavier barbell lifts, choose a bar, plates, and a rack first. If you need space-friendly functional strength, favor adjustable dumbbells, kettlebells, or a trap bar.
Consider practical constraints and planning steps:
Write a prioritized shopping list and revisit it after one month of training to refine purchases.
Step 2: Choose the High-Impact Equipment
What two or three purchases provide 80% of your results? The law of diminishing returns is real.Prioritize gear that gives the biggest strength return per dollar and square foot. Start with a quality barbell and enough weight plates so you can progress on squats, deadlifts, presses, and rows — for example, a 20 kg bar plus 100+ kg of plates for most beginners.
Buy these core items:
Add versatile extras:
Avoid impulse buys like isolated machines, novelty gadgets, or overpriced cardio toys. Buy quality in core items; you’ll save money, time, and frustration long term.

Step 3: Optimize Layout and Safety
Think like a gym owner — safety beats style, and small layout tweaks multiply workout quality.Design your space for efficient movement flow and safety. Measure the room, then mark clear paths for loading, racking, and moving the barbell. Check ceiling height—leave at least 8–10″ above your reach for overhead presses or jerks.
Anchor heavy equipment or pick wide-footprint models to prevent wobble. Install rubber flooring or interlocking mats to protect floors and cut rebound and noise.
Plan these basics:

Step 4: Build a Strength-Focused Program
Forget random workouts — this is about measurable progress. Want raw strength? Track the hard lifts.Choose programming that emphasizes progressive overload on the main lifts you prioritized. Prioritize squat, deadlift, press, and row variations across 2–4 weekly sessions and add accessory work for weak points.
Use an example: Monday heavy squat (3×2–3), Wednesday volume deadlift (4×6), Friday press/row (3×5) plus accessory work.
Track mobility, sleep, and nutrition alongside training to support strength gains.

Step 5: Master Loading and Progression Tools
Not every rep is equal — microloading, volume cycling, and auto-regulation can unlock plateaus.Master loading by prioritizing steady, intelligent increases over chasing big numbers. Use microloading when jumps feel too large—add 0.5–1 kg (or 1–2.5 lb) plates so you can progress without stalling. Auto-regulate intensity with percentage-based plans (e.g., 70–85% 1RM) or RPE (6–9) to match daily readiness.
Track weekly volume (sets × reps × weight) and aim to increase total tonnage gradually rather than a single PR. Cycle intensity and volume across weeks: for example, 2–3 heavy weeks for neural strength followed by 1 lighter, higher-rep week for recovery and hypertrophy.
Use simple accessory circuits (2–3 exercises, 3 rounds of 8–12) to fix weak links without draining recovery. Rest 2–5 minutes between heavy sets to maintain performance across top sets.

Step 6: Track Progress, Recover, and Iterate
If you’re not measuring, you’re guessing. Small recovery wins compound into big strength.Track your workouts every session: record lifts, sets, reps, weight, RPE, bodyweight, and quick notes on sleep or soreness. For example: “Squat 5×5 @100 kg, RPE 8; slept 7.5h; knee sore.”
Review trends every 4–8 weeks to spot plateaus or technique regressions and adjust accordingly.
Prioritize recovery that actually moves the needle: sleep 7–9 hours, hit daily protein targets, stay hydrated, and schedule active recovery (light bike, walking).
Use mobility drills and periodic massage/foam rolling to preserve movement quality.
Change only one variable when stalled — increase frequency, alter rep ranges, or refine nutrition — and test that change across several workouts before switching again.
Celebrate small wins and be patient. Keep short video logs to monitor and fix technique.

Conclusion
Equip smart, train consistently, and prioritize safety and progression; with the right gear, layout, and program your home gym can deliver real strength gains. Start small, track progress, adjust intelligently, and enjoy measurable strength over months and years—ready today?


Solid checklist — saved me from impulse buys (looking at you, overpriced kettlebell shop 😂).
One quick thing: if you have limited ceiling height, watch overhead movements and rack placement. I had to adjust my squat rack because of a low garage door — annoying but fixed with a little planning.
Nice — fold-away could be a game-changer for some. Thx!
Also consider fold-away racks or wall-mounted storage if garage height is an issue. Saved my setup.
Ha — impulse kettlebells are a real danger. Good call on ceiling height and door clearances; always measure before buying a tall rack.
Great guide — loved the practicality of Step 2. I went heavy on adjustable dumbbells and a basic barbell setup last year and actually saw steady strength gains.
A couple things I’d add: a good bumper plate set (if you have space) and a decent power rack with safety pins — saved my neck more than once. Also, love that you emphasized progression tools in Step 5.
Do you recommend getting calibrated plates or are generic bumpers fine? Trying to keep costs down.
Thanks Ethan — glad it worked for you. Bumpers + rack is definitely a sweet spot for most people who want to get serious safely.
Agree on the power rack. If you can only get one thing, I’d pick the rack over fancy plates. Safety first!
Solid overall. Step 4 (Build a Strength-Focused Program) could use a couple of example templates for different goals — like a 3-day vs 4-day split for pure strength vs mixed strength/hypertrophy.
I know you hinted at rep ranges and frequency, but maybe include a sample week with exercises and loading percentages? Would help beginners a lot.
Good suggestion, Marcus — adding a downloadable 3/4-day sample program is on the roadmap. For now: 3-day could be full-body with compound focus (5×5-ish), 4-day can split upper/lower with accessory hypertrophy work.
Percentages scared me at first — RPE saved my sanity. 😂
Also consider auto-regulation like RPE for folks who can’t follow strict %s yet — easier to manage progression without a coach.
If you want a quick start: 3-day full-body (squat, press, deadlift variants) with 3–5 sets at 3–6 reps for the main lifts. Add accessories 8–12 reps. Worked well for me.
Layout & safety section was super useful — I finally moved my treadmill and boxed the rack into a corner so plates won’t roll into the baby’s play area.
Question: for rubber flooring, is 1/2″ enough for dropping light-ish weights or should I go 3/4″? I’m not doing olympic lifts but don’t want to damage the concrete.
Also, love the checklist format in Step 3. Nice and doable.
I used 3/4″ and it made a big difference for noise. Also, interlocking tiles are way easier to install if you’re not handy.
1/2″ rubber tiles are fine for light drops and general use. If you expect occasional heavier drops or want extra noise reduction, 3/4″ or dedicated lifting mats are better. Good call on protecting concrete!
Pretty comprehensive but felt like the warm-up and mobility bits were a little light. You mentioned them in Step 6 but didn’t give routines.
If someone is chasing strength, skipping movement prep is a fast way to nagging aches. Maybe add a 10-minute dynamic warm-up and a 5-minute daily mobility routine? Would be super useful.
I do 5 mins bike + banded shoulder routine before pressing days. Keeps my shoulders happy and strength gains steady.
Good point, Hannah. We’ll expand Step 6 with a sample 10-minute dynamic warm-up and mobility flow tailored to squat/press/pull days.
Yes exactly — small investments in prep = big returns later. Thanks!
If you have limited time, foam rolling the hips + a few glute activation moves before squats helped me a ton.